I haven’t missed it, have I?! As some of you may know, August is National Peach Month; and even though it’s in the eleventh hour, I wanted to put something together in its observance.
Originally I was endeavoring to do something based on Princess Peach, as it seemed all too appropriate. Unfortunately, most of the in-game foods related to her are in the form of the strawberry festooned birthday cakes she bakes for Mario and friends; we’ll just have to put that on the back burner for now :]
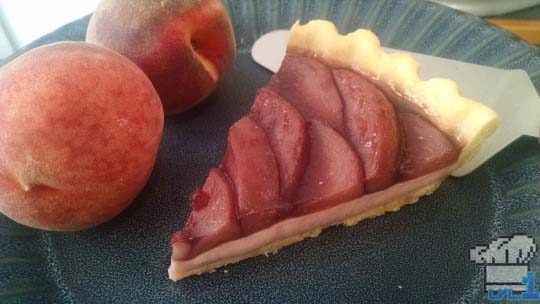
While searching in-game Mario food for inspiration, I was reminded of the overwhelming quantity of recipes from the Paper Mario series. Sure enough, there were a few peachy edibles among the ranks, so I decided on this one from Super Paper Mario (as well as TTYD): Peach Tart.
![]()
So this one’s for you, Princess, even if only in name alone.
Click ‘Continue Reading’ and we will go through the three main components of this dessert, together…
+ Sugar Tart Dough +
Yield: 1 9″ or 10″ tart pan
ITEMS
| Ingredient | Amount |
|---|---|
| AP Flour | 1 1/3 cup |
| Salt | 1/4 tsp |
| Confectioner’s Sugar | 1/3 cup |
| Butter (cold) | 1/2 cup (1 stick) |
| Egg | 1 yolk + 1 whole egg |
| Water | as needed |
| Almond Extract | 1/4 tsp |
EQUIP
- Kitchen Knife
- Large Bowl
- Wooden Spoon
- Pastry Cutter, Fork, or Fingers
- Tart Pan (removable bottom works best)
- Rolling Pin
- Pastry Brush
- Plastic Wrap
- Parchment Paper
- Dried Beans/Pie Weights
WALKTHROUGH
- Combine the first three ingredients in a large bowl
- With a sharp knife, cut the cold butter into small cubes and add them to the flour mixture (don’t throw away the butter wrapper!)
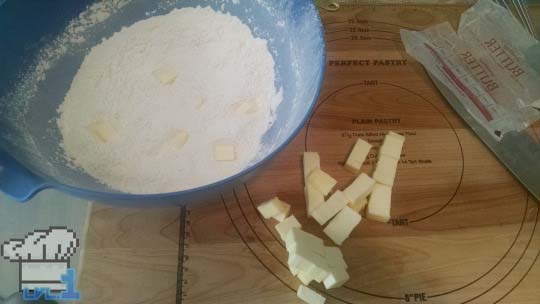
- Using a pastry cutter, a fork, or your fingers, work the butter into the dough until there are no more cubes, and the consistency is that of coarse sand
- Add the egg yolk to the bowl and use a wooden spoon to mix it together, making sure to avoid having any large clumps of unmixed yolk
- Add the almond extract and then roughly 1 TBSP of cold water to the bowl. Continue to mix until a smooth dough is formed (no crumbly bits). More water may be required, but not much
- Form the dough into a flat cylinder (think, tuna can) and wrap tightly in plastic wrap. Place in the refrigerator for at least 30 minutes
- At this point we can use the butter wrapper you saved to lightly grease the inside of the tart pan
- Turn out the firm dough on to a lightly floured surface and use a rolling pin to roll out the dough to a circle about 2″ larger in diameter than the size of your pan
- Starting from the side nearest you, use the rolling pin to roll upwards, wrapping the dough around it as it goes. Hold it above your tart pan and unroll it back towards yourself, draping it over the edges as you go
- Gently press the dough down into the tart pan. You can trim any excess dough that might be sticking up above the sides by rolling the rolling pin along the edges. Use a fork and prick (dock) the bottom of the dough several times. Place the dough back in the fridge to firm up.
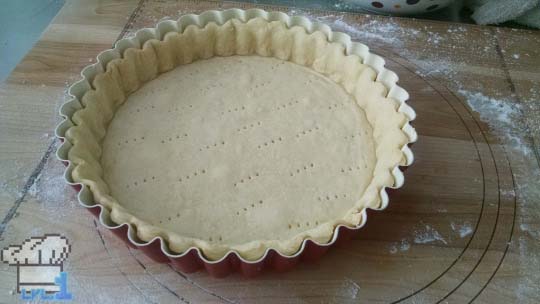
- Set your oven to 400F, and once the dough is firm (about 20 minutes) lay a large piece of parchment paper on the tart shell and pour about a cup of dried beans, or pie weights, to fill the inside (this, and the docking, prevents the dough from baking all lumpy). Bake the crust for 10 minutes
- Remove the parchment, a pie weights or beans, and bake for an additional 10 minutes, or until the crust is just starting to brown
- Remove the tart crust from the oven and let it cool for about 5 minutes. In the meantime, crack an egg into a small bowl, or measuring cup, and lightly beat it with a little water or milk. Brush this over the inside of the tart crust and put it back in the oven for a final 5 minutes bake time.
- Remove from the oven and let the crust cool completely (this egg wash creates a barrier so the bottom won’t get soggy later; it also improves color, and taste!).
+ Panna Cotta +
**this is the bottom layer of your tart
ITEMS
| Ingredient | Amount |
|---|---|
| Whole Milk | 7 oz |
| Heavy Cream | 7 oz |
| Sugar | 3 oz |
| Powdered Gelatin | 5 1/2 g |
| Cold Water | 2 TBSP |
| Vanilla | 3/4 tsp |
| Vanilla | 3/4 tsp |
| Food Coloring (optional) | as needed |
EQUIP
- Small Saucepan
- Small Bowl
- Whisk
- Small Cup
WALKTHROUGH
- Add the first 3 ingredients to a small saucepan, and heat just until sugar is dissolved
- Place the powdered gelatin in a small cup, and pour the cold water over top of it. Stir to combine, making sure there aren’t any lumps (this is called ‘blooming’)
- Add the bloomed gelatin to the warm milk mixture, along with the vanilla, and stir until dissolved. (Optional: to be more accurate to the sprite, I added a little pink icing color at this point)
- Once it has cooled slightly, pour the panna cotta into a small bowl, wrap, and place it in the refrigerator to set
+ Poached Peaches +
**this is the top layer of your tart
ITEMS
| Ingredient | Amount |
|---|---|
| Large White Peaches | 4-5 each (~ 26 oz) |
| Red Wine * | 1 1/2 cups |
| Water | 1 cup |
| Sugar | 3/4 cup |
| Powdered Gelatin | 4 g |
| Cold Water | 1 TBSP |
EQUIP
- Medium Saucepan
- Colander
- Large Bowl
PROCEDURE
- Peel the peaches, cut them into thick wedges, and place them in a medium saucepan
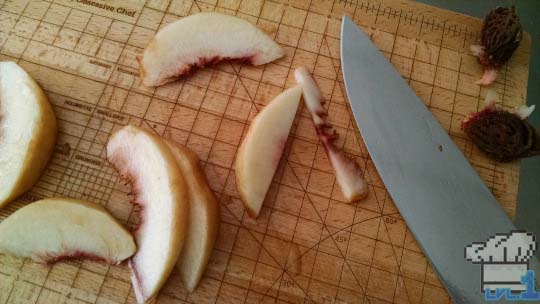
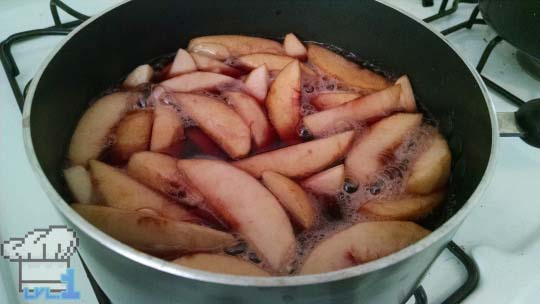
- Add the red wine *(most drinkable red wines will do fine here; I used a Côtes du Rhône), water, and sugar, and bring to a boil. Reduce to a simmer and leave to poach for 25-30 min
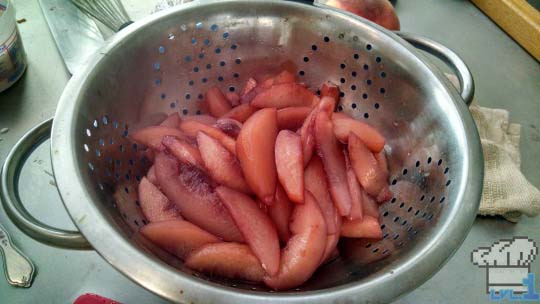
- Place a colander above a large bowl and strain the peaches, while saving the poaching liquid. Set peaches aside to cool
- Mix the powdered gelatin and cold water as described above (in the panna cotta procedure) and add to the poaching liquid. Stir until dissolved, then set aside to cool
+ Tart Assembly +
ITEMS
- Tart Shell
- Panna Cotta
- Poached Peaches
- Poaching Liquid
EQUIP
- Small Sauté Pan
- Whisk
WALKTHROUGH
- Scrape the thickened panna cotta into the pan and heat very gently until it begins to become liquid. Use a whisk to make sure there aren’t any solid chunks, and pour the panna cotta into the tart shell enough that it comes halfway up the sides. Refrigerate until firm
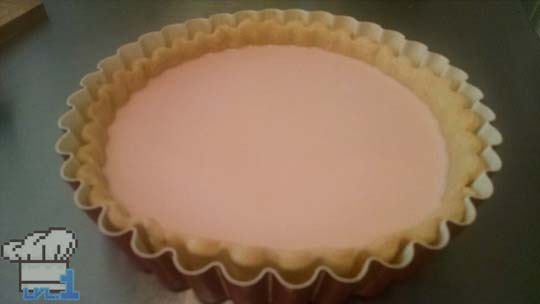
- Once the panna cotta is set, begin arranging the poached peaches on top in a spiral pattern, starting from the outside and working inwards
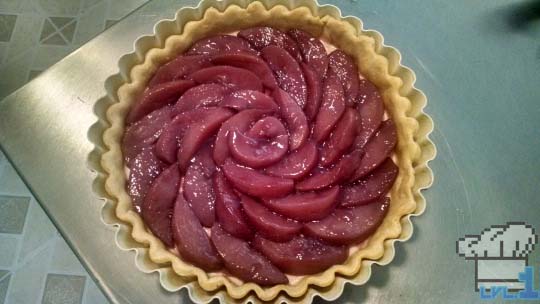
- Heat the poaching liquid in a pan, much like you did the panna cotta, and stir until it has melted completely. Pour over the poached peaches until they are about halfway covered. Refrigerate until firm
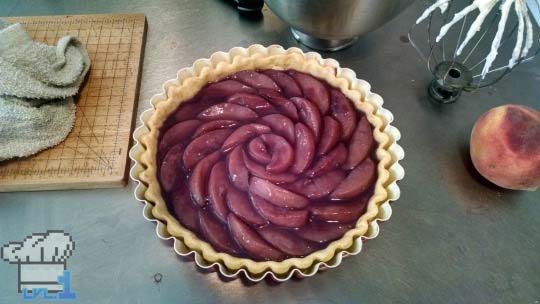
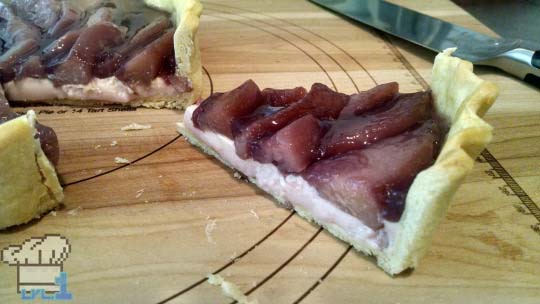
- You’re done! Dry it with a dollop of fresh whipped cream and enjoy!
Hey! Thanks for reading all the the way to the end! You’re awesome :D! If you haven’t already and are looking for more nerdy food stuff, consider following me on Twitter, Facebook, tumblr and Instagram. I post a lot of work in progress pictures for the blog as well as some stuff from my real job as a pastry chef. If that sounds like something you’d be into, please check out those links above! Anyway, take care everyone and I’ll see you soon with an all new recipe!

