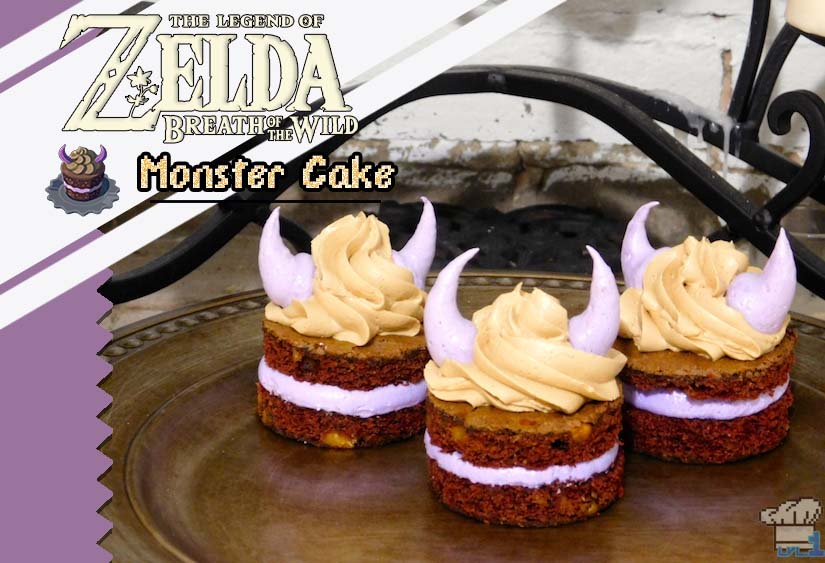
To say I was excited about the Legend of Zelda: Breath of the Wild would be an understatement. In fact, if you’ve been following the blog for a while, you might remember I threw a Breath of the Wild cookout last year to celebrate its announcement. I only had a few screenshots and videos to go on at the time and I still managed to churn out 8 recipes haha. Suffice it to say that when I actually got the game in my hands I had a recipe notebook ready to go in the other hand (three hands? eh whatever.) Anyway, I wanted to start off my Breath of the Wild recipe series with a bang, so here’s the fan favorite and number one requested recipe from my Twitter followers: the Monster Cake.
Some of the most striking food items in the game are made with an ingredient called monster extract. This rare ingredient can only be obtained from a shady merchant named Kilton who runs The Fang & Bone, a shop specializing in all things monster. If you give some of the monster parts you’ve picked up to Kilton you can trade for a number of bizarre items not found anywhere else. From monster masks that let you blend in with your enemies, to utterly ineffective squeaky hammers, to just plain old ordinary mops, Kilton’s shop certainly has… things.
But it does have monster extract, and that’s something Link will need to succeed at this recipe.
It’s interesting to note that the Monster Cake is one of the few food items that has its recipe described in game. An excerpt from the Royal Family’s Secret Recipe Book reads as follows:
The Chancellor’s Favorite: Monster Cake
Stew Monster Extract, Tabantha Wheat, Cane Sugar, and Goat Butter for a spell. “It’s a dangerous dish that makes your head fuzzy and may even motivate you to plan evil schemes!”
I don’t know who this Chancellor was, but he seems like a pretty shifty dude to me if this was his favorite recipe.
While deciding how to put this cake together in real life I tried to pick components that matched the sprite. There’s not much in game information about how the Monster Cake tastes other than it’s “unforgettable sweetness.” The only other hint we get is from an enthusiastic NPC named Gotter who, after delivering a monster cake to him via a side quest, remarks that it tastes like biting into a Chuchu. For the uninitiated, Chuchus are gelatinous blob enemies that appear in several Legend of Zelda games and are known for the ‘jelly’ they produce. Looking at the sprite however, the filling seemed too opaque for a jelly so I opted for the best blobby filling: meringue. This actually worked out great because I had already planned on making the horns out of baked meringue; two birds with one recipe!
Because it takes a while to bake and dry out the meringue, you may wish to tackle this recipe over two days and I’ve outlined how to go about it below. That being said, I can’t wait to share more Breath of the Wild recipes with you all in the coming weeks so be sure to subscribe to the newsletter and be notified as soon as they come out. Also, let me know if you give the recipe a shot! I’d love to hear about your results in the comments section.
Now, let’s find a cooking pot and get to it!
+ Chocolate Walnut Cake +
makes enough for 12 3″ rounds
ITEMS
| Ingredient | Amount |
|---|---|
| Dark Chocolate Chips | 3 oz |
| Hot Water | 3/4 cup |
| AP Flour | 2 cup |
| Baking Soda | 1 tsp |
| Salt | 3/4 tsp |
| Butter (room temp) | 2/3 cup (11 TBSP) |
| Sugar | 1 cup |
| Brown Sugar | 1/2 cup |
| Eggs | 2 |
| Vanilla | 1 tsp |
| Walnuts | 1 cup |
EQUIP
- 9″ x 13″ Cake pan
- Electric stand mixer
- Small cook pot
- Heat safe bowl
- Rubber spatula
- Parchment paper and pan spray
- 3″ circle cutter
WALKTHROUGH
1) Preheat the oven to 350F
2) In order to get the most flavor out of the walnuts, we’ll toast them first. Place the walnuts on a baking tray and stick them in the oven for about 13 minutes or until they become fragrant. Pull them out and set aside to cool.
3) While the nuts are toasting, bring a few cups of water to a boil over medium high heat. Place your chocolate chips in a heat safe bowl and pour a measured 3/4 cup of hot water over the top. Stir them together to melt the chocolate and set aside to cool.
4) With the nuts toasted and chocolate melted we can start the cake in earnest. In the bowl of an electric mixer fitted with the paddle attachment, cream together the butter, sugar, and brown sugar for 3 minutes on medium high speed. Remember to scrape down the bowl every once in a while to help prevent unmixed batter from sticking to the sides. Reduce the speed the medium and add the eggs one at a time as well as the vanilla until fully mixed.
5) In a separate bowl, combine the flour, baking soda, and salt. Reduce the mixer speed to low and add one third of this dry mix. Once it’s been incorporated, pour in half of the now cool chocolate and water mixture. Continue to alternate dry and wet ingredients (dry, wet, dry, wet, dry) until it’s all been has been added. Finally, pour in the toasted walnuts and mix briefly to combine.
6) Spray and line the cake pan with parchment paper and spray the top as well. Pour in the chocolate cake batter using a spatula to level it if necessary. Bake the cake for 30 minutes then set it aside to cool. If you’re making this a day in advance as suggested, cover in plastic wrap and hold in the refrigerator overnight.
+ Monsterous Italian Meringue +
You’ll want to make this the night before you assemble the cakes to give the horns enough time to dry out.
ITEMS
| Ingredient | Amount |
|---|---|
| Egg Whites | 4 |
| Sugar | 1 cup |
| Water | 1/2 cup |
| Purple Icing Dye | ~ 4 drops |
| Salt | pinch |
EQUIP
- Small cook pot
- Electric stand mixer
- Pastry brush (recommended)
- Candy thermometer (recommended)
- Rubber spatula
- Pastry bag with plain tip
- Baking sheet
- Silicone mat or parchment paper
WALKTHROUGH
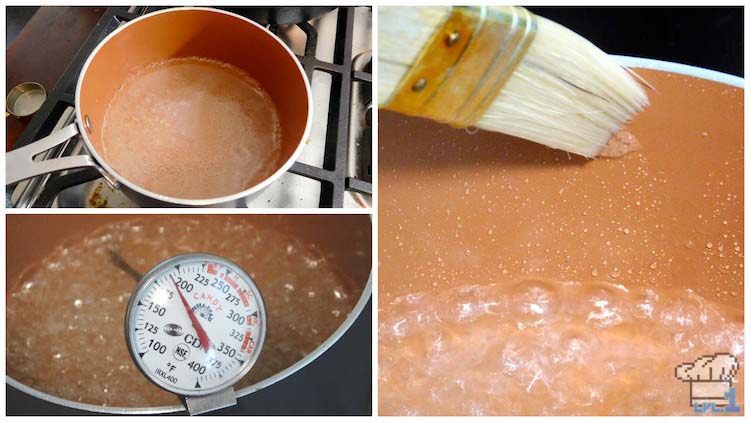
1) I’ve explained how to make Swiss Meringue in previous posts, but this time we’ll be making the Italian version. It’s a little trickier to pull off, however it’s the most stable of the meringues and that’s definitely what we want for this cake. Start off by combining the sugar and the water in a small sauce pan and placing it over medium high heat to dissolve. Stir only until the solution begins to boil and then leave it alone. Any further agitation can cause crystallization which will lead to a lumpy, perhaps crunchy final product. If you notice that the sides of the pot are becoming flecked with sugar as the pot boils, use a pastry brush with some water to wipe down the edges. We’ll be cooking the sugar until the temperature reaches 240F, so insert a candy thermometer and begin the next step while it’s still heating up.
2) Place your 4 egg whites in the bowl of an electric mixer fitted with the whisk attachment and whip on medium speed. By the time the sugar reaches 240F, the eggs should be at soft peaks as shown below, but no tighter. Feel free to adjust the speed of the mixer as to not over mix.
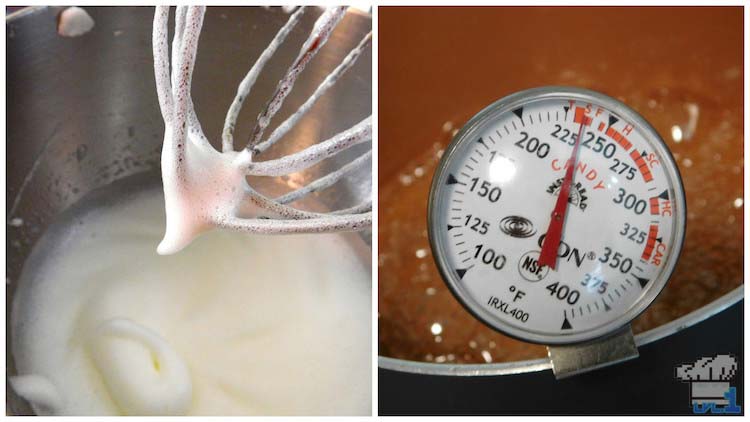
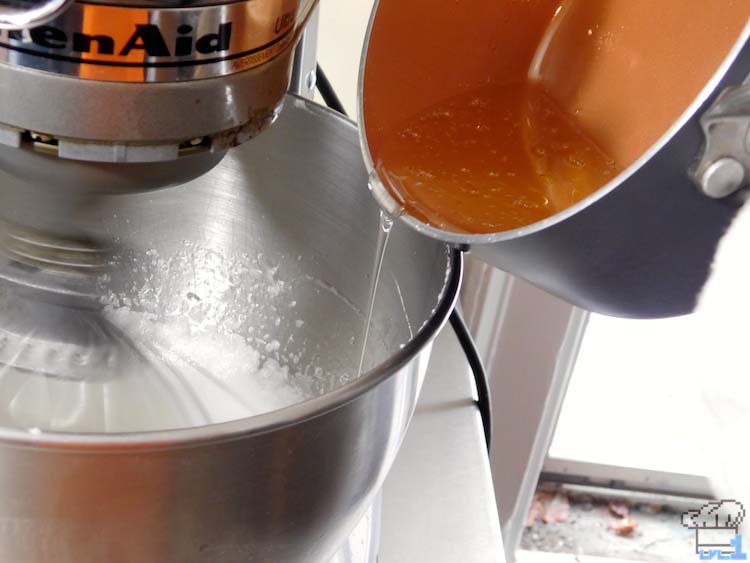
3) Once you’ve achieved soft peaks with your egg whites and 240F with your sugar, it’s time to combine them. This is the tricky part as you’ll be adding a very hot liquid into the mixer. Add too fast and the eggs will scramble, too slow and the sugar will crystalize. In order for the meringue to come together successfully, increase the mixing speed to medium high and pour the sugar in a steady stream (slightly faster than the picture below) into the bowl right where the egg whites meet the side. It’s important not to pour the sugar on to the whip or it will be flung onto the sides of the bowl and not mix with the eggs.
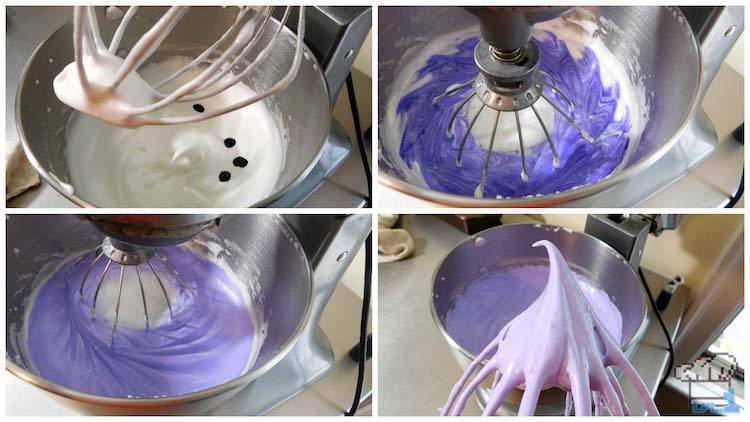
4) Once all the sugar is added, continue to mix for another 30 seconds and then stop the machine. Add in your icing dye and then resume the mixing at medium speed. You have noticed that the meringue has grown quite a bit in size by now! Continue to whip the meringue until they hold a stiff peak and still appear glossy.
5) Scoop the meringue out of the mixing bowl and divide it in half between two pastry bags fitted with medium sized plain round tips. We’ll be using one bag for the cake filling and the other to pipe out the monster cake horns. Place the cake filling bag into the fridge to chill overnight.
6) Preheat the oven to 250F
7) To pipe the monster cake horns, line your baking sheet with parchment paper or a silicone mat. In order to get the horn shape there are three basic steps I’ve done my best to outline in the photo below. First, with the pastry bag upright, make contact with the mat and begin with a penny sized blob. Next, lift the pastry bag up about one inch while keeping constant pressure. Lastly, and at the same time, release the pressure on the bag as you quickly pull the tip in a horizontal direction.
This technique certainly takes some practice, but you have a whole bag of meringue to use so pipe away! Don’t get discouraged if you’re having trouble, I had some pretty freaky looking horns the first time I tried it as well. In the worst case, you can always scrape the messed up horns back into a pastry bag and try again :]. Even though you won’t need all of them, I’d still suggest filling your baking sheet so you can pick the best ones to garnish with in the end.
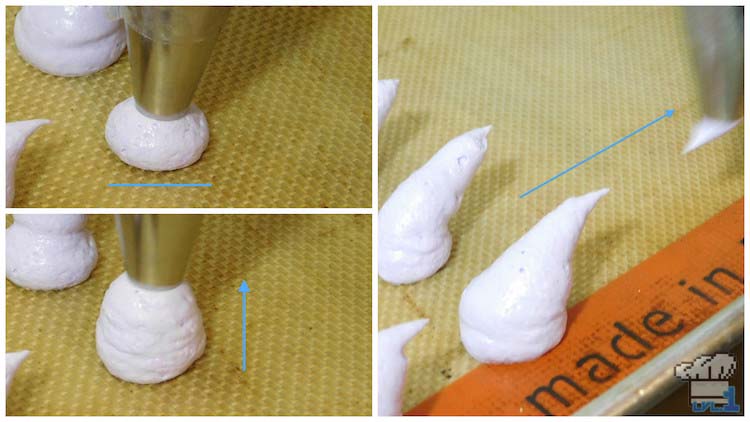
8) Once you’re happy with your horns, place the baking sheet into the oven and bake them for 1 to 2 hours or until they become crisp and are no longer sticky to the touch. If your oven has a pilot light, you can leave these guys in overnight to dry out as well.
+ Coffee Buttercream +
The coffee flavor really goes nicely with the toasted nuts of the cake and will give you that extra boost to outrun those annoying Lizafos. Make this recipe after the other two are complete and you’re ready to assemble.
ITEMS
| Ingredient | Amount |
|---|---|
| Butter (room temp) | 1 cup (2 sticks) |
| Powdered Sugar | 3/4 cup |
| Vanilla | 1/2 tsp |
| Salt | 1/2 tsp |
| Instant Coffee | 1 TBSP |
| Hot Water | 2 TBSP |
EQUIP
- Electric stand mixer
- Rubber spatula
- Pastry bag with star tip
WALKTHROUGH
1) Start by dissolving the instant coffee in hot water and setting aside to cool
2) Place the room temperature butter in the bowl of an electric mixer fitted with the paddle attachment and begin to mix at medium high speed. After 2 minutes reduce the speed to low and slowly begin adding the powdered sugar while periodically scraping down the bowl. After all the sugar has been combined, pour in the vanilla, salt, and instant coffee and mix for an additional minute on low speed. Increase the mixing speed to high and whip until the buttercream in light and fluffy.
3) Place the buttercream into a pastry bag fitted with a medium sized star tip and get ready to assemble these monster cakes!
+ Monster Cake Assembly +
ITEMS
| Ingredient | Amount |
|---|---|
| Chocolate Walnut Cake | recipe above |
| Monsterous Italian Meringue | recipe above (1 bag) |
| Coffee Buttercream | recipe above |
| Monsterous Meringue Horns | recipe above (as needed) |
EQUIP
- 3″ round cutter
- Serrated knife and cutting board
- Pastry bags with appropriate tips
WALKTHROUGH
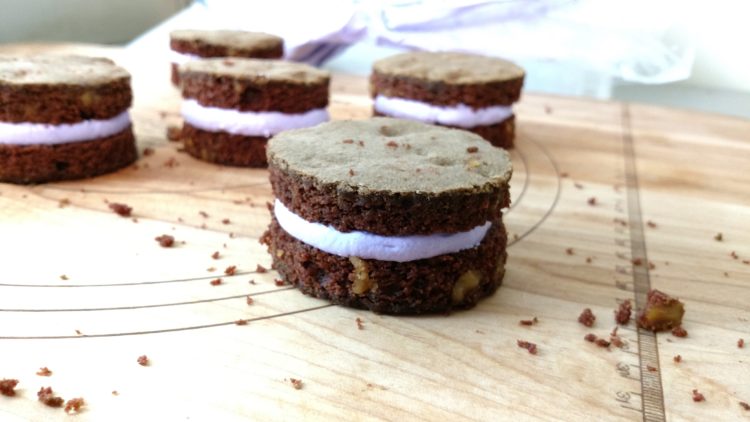
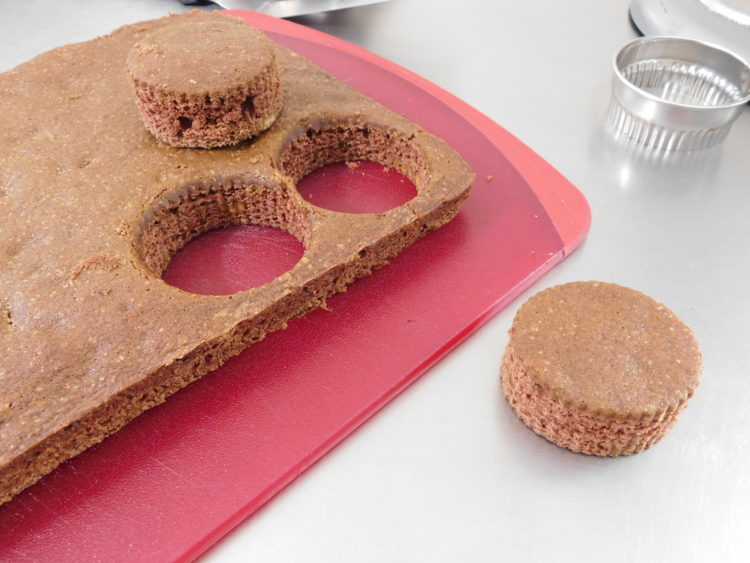
1) Assembling these little monsters is a snap! Remove the chocolate walnut cake from the baking pan and remove the parchment paper from the bottom. Use a 3″ round cutter to punch out 12 portions. Use a serrated knife to cut the small cakes in half horizontally.
2) Next, pipe a large dollop of meringue onto the base of each monster cake and press down gently with the top layer to create a sandwich.
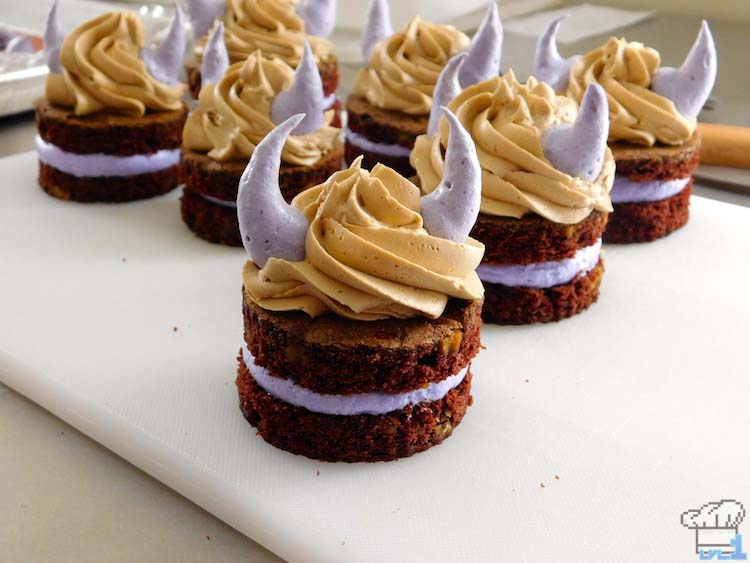
3) Take out your coffee buttercream and pipe a large rosette on to the top of each cake. A good tip for getting a nice swirl is to start from the center, spiral out to the edge, and then come back to the middle to finish.
4) Now all that’s left is to take your most beautiful meringue horns and garnish the tops! You should be able to just push them down into the sides of buttercream and they’ll stay put.
Hey! Thanks for reading all the the way to the end! You’re awesome :D! If you haven’t already and are looking for more nerdy food stuff, consider following me on Twitter, Facebook, tumblr and Instagram. I post a lot of work in progress pictures for the blog as well as some stuff from my real job as a pastry chef. If that sounds like something you’d be into, please check out those links above! Anyway, take care everyone and I’ll see you soon with an all-new recipe!
– Bryan

