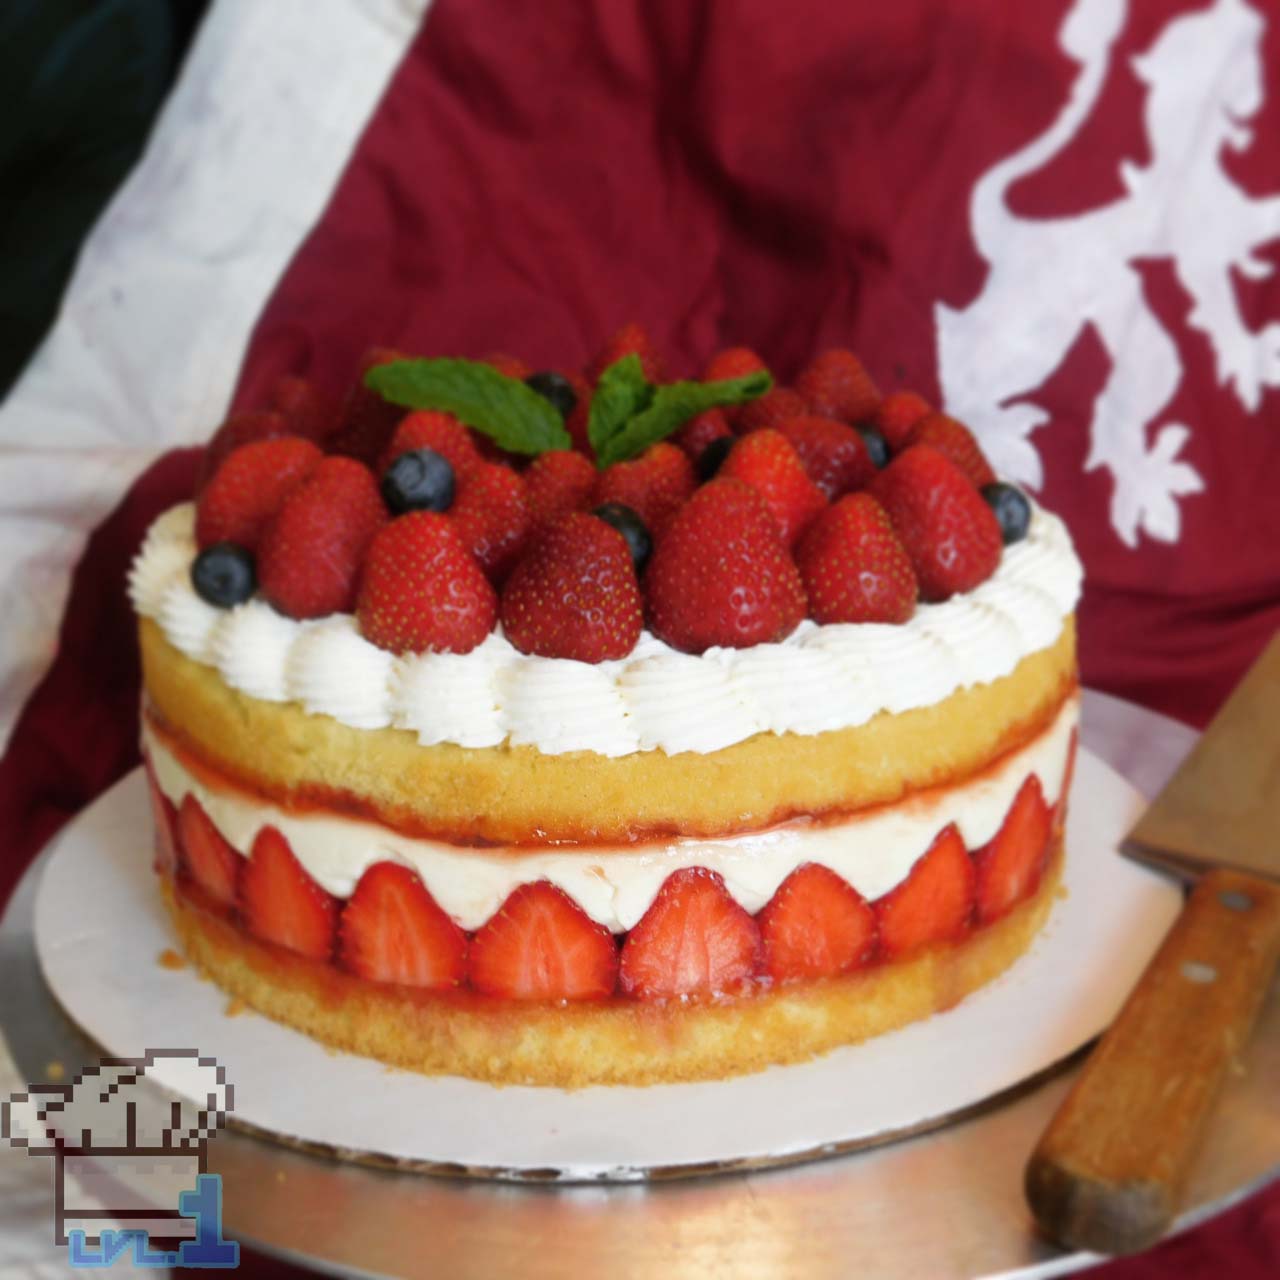
Playing a pastry chef in a video game is pretty much my dream come true; so when I heard that Bravely Second was going to have a Pâtissier class, I rushed right out to pick it up. As one might expect, the game abounds with tasty treats and confectionery marvels!
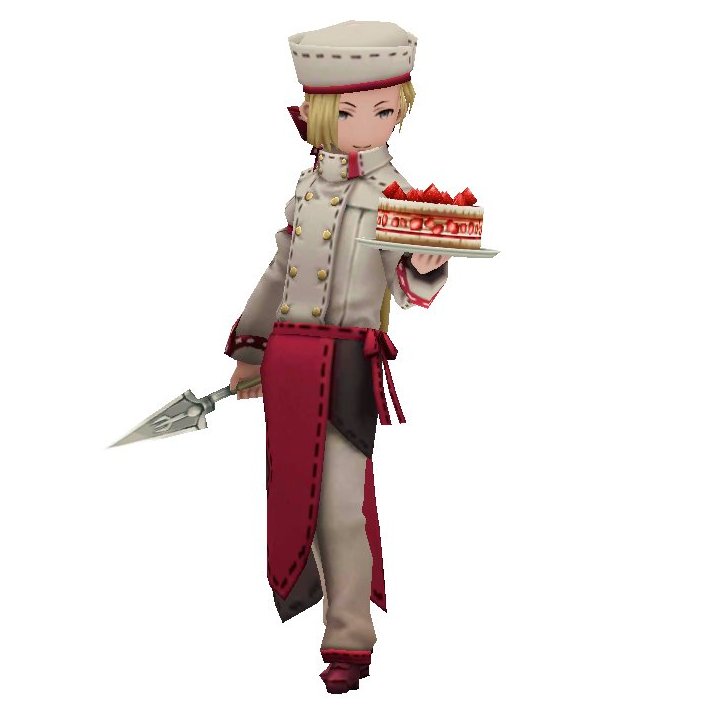
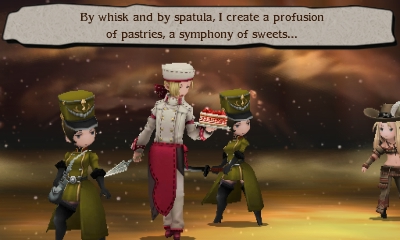
In order to acquire the pastry chef class, you must first defeat the “asterisk holder” of said class in battle. In this case, the holder of the pâtissier asterisk is a boastful, condescending lady-killer named Angelo OVO Panettone. I could go into more detail about the in-game specific of the pâtissier glass (and I plan to in a future post), but right now I want to talk about the traveling confectioner himself; or more specifically, the cake he holds in battle.
Along with a rather lethal looking cake server, Angelo won’t be caught dead in battle without his trusty strawberry layer cake; or, “Frasier” as it’s commonly known. This week I attempt to recreate the iconic dessert as I channel my inner “Pâtissier Nonpareil!” Check out the recipe after the jump!
As with all cakes, this recipe will be the sum of many different parts, mainly: Genoise Sponge Cake, Bavarian Cream Filling, and Buttercream Frosting. I’d recommend baking the cake ahead of time in order to make the day of assembly much less daunting.
+ Genoise Sponge Cake +
ITEMS
| Ingredient | Amount |
|---|---|
| AP Flour | 1 2/3 cup |
| Eggs | 7 each |
| Sugar | 1 3/4 cup |
| Butter (melted) | 7 TBSP |
| Vanilla | 1 1/2 tsp |
EQUIP
- 2 x 8″ Cake Pans
- Electric Stand Mixer
- Sifter
- Large Bowl
- Rubber Spatula
- Parchment Paper
- Pan Spray
- Serrated Knife
WALKTHROUGH
- Preheat your oven to 350F
- Start by placing the eggs and sugar in the bowl of an electric mixer fitted with the whisk attachment, and mix on high speed until “ribbon” (this is when an egg and sugar mixture is whipped enough so that when drizzled off of the whisk, it creates a little snake, or ribbon, of batter). Check out the frame below for an example. This process will take about 7 minutes
- In the meantime, sift the flour to make sure it’s nice and aerated, and set it aside for later.
- Once you’ve achieved ribbon, combine your melted (and cooled!) butter, with the vanilla, and slowly drizzle it in to the egg foam. While mixing, be careful not to let it splatter on the sides of the bowl.
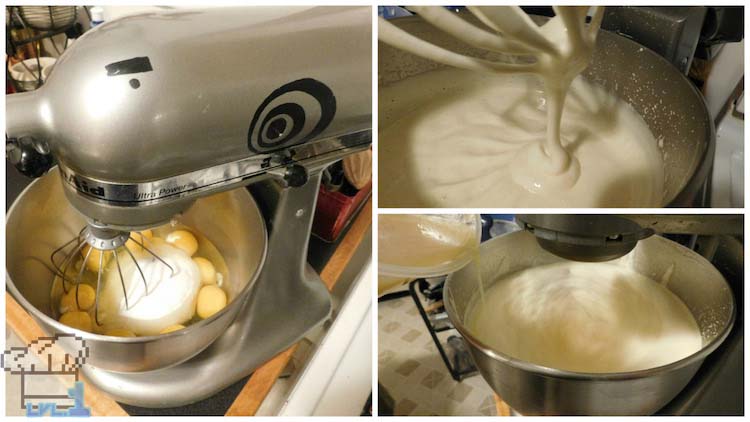
- Remove the bowl from the machine and add the sifted flour to it, in three separate additions. Use a rubber spatula to gently fold in each addition until you can no longer see any bits of dry flour. It’s important to not mix too vigorously at this stage, in order to maintain a foamy batter.
- Spray and line the two cake pans, and divide the batter evenly between them (about 450g per pan). Place them on the middle rack of your oven, and bake for 35 minutes.
- After baking, set the cakes aside to cool. Once cool, use a serrated knife to slice off the very top layer (the sticky part) of the cake. At this point, the cake can be wrapped and frozen for up to a week if you don’t plan to assemble the Frasier right away.
+ Cake Assembly Pt. 1 +
ITEMS
| Ingredient | Amount |
|---|---|
| Genoise Cake | 1 layer |
| Simple Syrup | 1/2 cup |
| Strawberry Jam | 3 oz |
| Fresh Strawberries | 1 qt |
EQUIP
- 8″ Charlotte Ring
- Acetate Strip
- Pastry Brush
- Spoon or Offset Spatula
- Sharp Knife
- Cutting Board
WALKTHROUGH
- Cut a length of acetate long enough to cover the circumference of the 8″ cake (about 26″) and use it to line the inside of a Charlotte ring. Clear acetate strips are used in lots of fancy pastries in order to achieve a nice clean edge on the sides of cakes that aren’t frosted. The charlotte ring will provide support for the strip during the assembly process, but you could also use the ring of an 8″ springform pan if necessary.
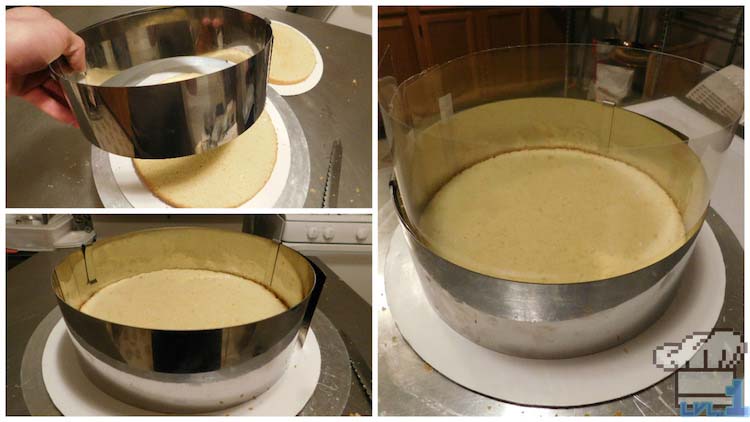
- Brush the cake with simple syrup, and then cover it with a thin layer of strawberry jam. Whisking up the jam beforehand helps improve its spreadability. It might not seem like a lot, but too much jam will end up squishing out under the weight of additional layers, so keep it light.
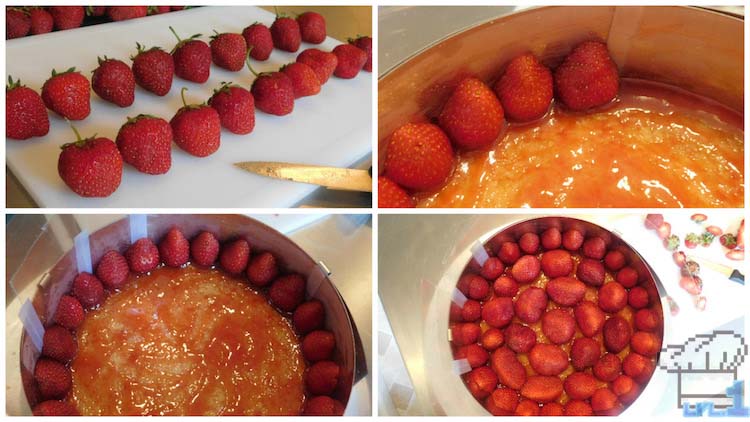
- Cutting the strawberries in half to line the outside of the cake might just be my favorite part of the entire procedure. :] Pick through all of your strawberries and choose those of similar size and shape to achieve a uniform border. Hull the berries (meaning remove the green stems and leaves) before you slice them in half and press them flat against the Charlotte ring, all the way around.
- Once the border is completed, hull the remaining berries and fill the inside of the cake. You’ll wan to make sure that they’re still the same height as the others, but the shapes can vary. Do your best to fill any empty space, as the strawberries will help support the top layer of cake.
+ Bavarian Cream Filling +
ITEMS
| Ingredient | Amount |
|---|---|
| Heavy Cream | 1 cup |
| Powdered Gelatin | 11 g |
| Cold Water | 4 TBSP |
| Egg Yolks | 4 each (save the whites!) |
| Sugar | 2 oz |
| Milk | 1 cup |
| Vanilla | 1 tsp |
EQUIP
- Electric Stand Mixer, or Whisk
- Large Mixing Bowl
- Small Sauce Pot
- Rubber Spatula
- Ladle
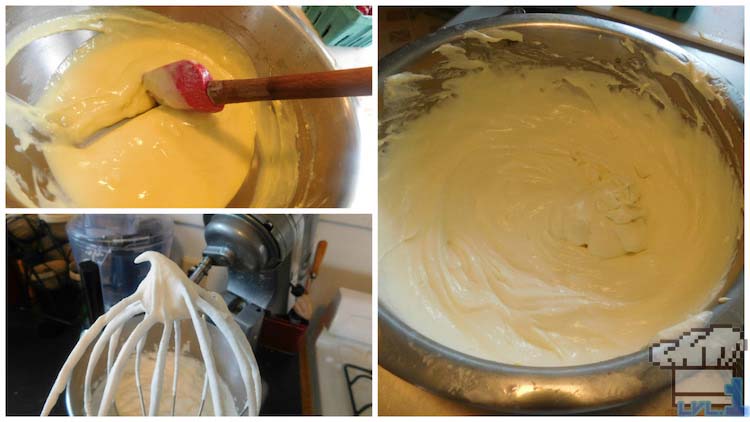
Bavarian cream is the combination of crème anglaise and whipped cream, with a little added gelatin to stabilize it. It’s important to not let the crème anglaise get too firm before folding in the cream, or the product will turn out chunky. To that end, we’ll start with the whipped cream.
WALKTHROUGH
- Whip the heavy cream until medium peaks (panel 2, above) and store in the refrigerator until needed.
- Mix the powdered gelatin with the cold water and set aside to bloom. The gelatin will absorb the water and form a stiff gel.
- Now the crème anglaise portion! Place the milk, vanilla and half of the sugar in the small pot over medium heat until it begins to steam. While that’s heating up, whisk together the egg yolks and second half of the sugar in a medium sized bowl until completely combined (when separating the eggs, save the whites to use later!)
- Once the milk begins to steam, use a ladle to slowly add it to the egg mixture, all while continuously mixing. This will help ensure the eggs don’t come up in temperature too quickly and scramble, or cook. After adding about 3/4 of the hot milk to the eggs, pour everything back into the pot and place it back on the stove over medium heat.
- Use a rubber spatula to continuously stir the pot while the egg milk mixture is heating up; our goal is to cook the mixture just until it begins to thicken up (~85F). You’ll know it’s there when you can draw a line across the spatula with your finger and the cream doesn’t dribble down into that line. This is called “napé,” which I go into a bit more detail on in my Butterscotch Cinnamon Pie recipe.
- Remove the pot from the heat and stir in the bloomed gelatin. Make sure that the gelatin has completed melted into the crème anglaise, and then set it aside to cool and thicken up. Keep an eye on the mixture, and once it begins to tight up (like in panel 1, above), add the whipped cream you had made earlier and fold it in with a rubber spatula
- Immediately after they are combined, pour the bavarian cream into the middle of the cake, making sure it gets into all the nooks and crannies surrounding the strawberries. Add just enough bavarian to cover the tops of the berries.
+ Cake Assembly Pt. 2 +
ITEMS
| Ingredient | Amount |
|---|---|
| Genoise Cake | 1 layer |
| Simple Syrup | 1/2 cup |
| Strawberry Jam | 3 oz |
| Buttercream | see below |
| Fresh Strawberries | 1 pt |
EQUIP
- 8″ Charlotte Ring
- Acetate Strip
- Pastry Brush
- Spoon or Offset Spatula
- Sharp Knife
- Cutting Board
- Piping Bag and Star Tip
Ok, we’re into the home stretch! I know its been a long one!
- Spread the jam on top of the bavarian cream in much the same way as before. Remember: less is more when it comes to this stuff.
- Brush the second genoise cake layer with simple syrup, invert, and place on top of the jam effectively capping the bavarian filling (see panel 1, below). At this point you can remove the Charlotte ring and acetate strip (carefully, as it can slide around!) and see how all of that hard work has paid off!
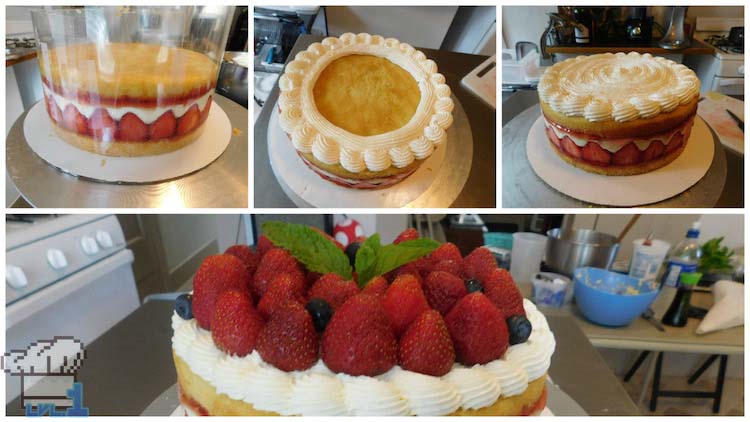
- I’ve topped this particular cake with a vanilla buttercream that I made using the leftover egg whites from earlier. you can follow the simple buttercream procedure from this recipe (towards the bottom of the post) and just omit the chocolate!
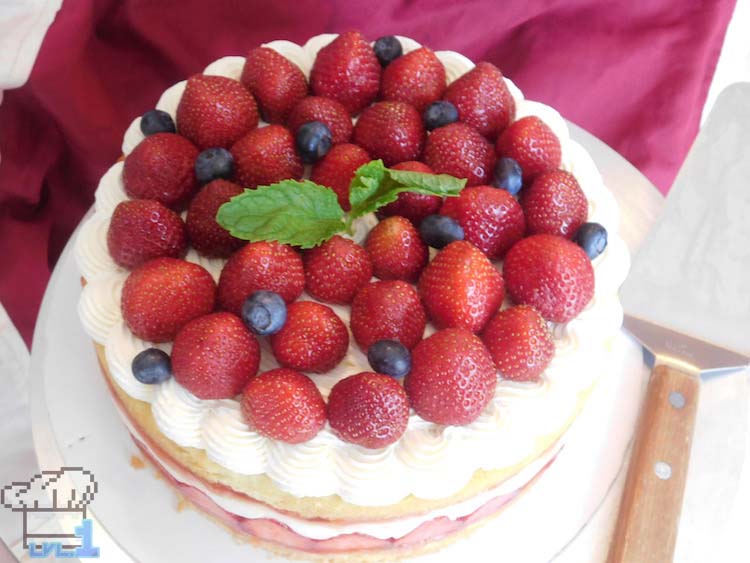
- All that remains is to festoon the top with more berries, and you have yourself a Frasier that even a level 10 patissier would be envious of!
Hey! Thanks for reading all the the way to the end! You’re awesome :D! If you haven’t already and are looking for more nerdy food stuff, consider following me on Twitter, Facebook, tumblr and Instagram. I post a lot of work in progress pictures for the blog as well as some stuff from my real job as a pastry chef. If that sounds like something you’d be into, please check out those links above! Anyway, take care everyone and I’ll see you soon with an all new recipe!

